Join A Kinders Garten Vintage Homeschool Membership to receive our newsletter in your inbox today to
take advantage of our future product sales!!
Classroom Tips
Art Supply Holder
An over the door shoe or handbag holder with separated pocket for each item can be hung behind the door or on a wall. Storing your art supplies in the pockets keeps them at hand and easy to choose. If storing paint bottles, be sure your door is sturdy enough to handle the weight.
Bulletin Board/Charts/Pocket
Charts Storage
To
organize
all my bulletin boards and posters, I purchased an inexpensive garment
rack, some hangers and clips. I hang my items on the rack in order of
themes from September to August. This makes them available and easy to
sort.
These
are sweet :
Dig
this garment rack cover:
Child Participation
Large
craft sticks are the BOMB to encourage class participation. Give your
child 5 - 10 sticks to decorate with glitter, stickers, etc. To store
their sticks, we use zippered pencil pouches. When they answer a
question correctly, have your child place their
stick into the RIGHT ANSWER container that you have decorated in
advance. At the end of the day, have your child count the sticks and
give them one prize such as a sticker for each stick. Then have the
child return their sticks to their pencil pouch.
Another Child Participation Idea:
Encourage
your children to participate in oral discussions and volunteer to
answer questions
by using a Talking Stick, any sturdy stick is copestetic. Decorate the stick ahead of time, then during class give the stick to the first student called upon
to answer. If the child answers correctly, they keep the stick until the
next question is asked. If they do not know the correct answer, they
may pass the stick to another child. The Talking Stick eliminates the
discomfort a child may feel when called upon to
give an answer they may not know.Giving them the responsibility of
choosing the next child to answer eliminates snickers and negative
comments of the other children as they know the child
holding Talking Stick is the one who selects the next child to answer.
It
will encourages your shy or apprehensive child to volunteer an answer in
order to gain
possession of the Talking Stick. Rules may be adjusted as suits the
lesson. A good rule is that no one child may have the Talking Stick no
more than so many designated times in a discussion.
It would help eliminate having only one or two children dominating the
discussions or answers.
Clean Desks
Shaving
cream removes pencil and pen marks from desk tops. Put some shaving cream on each
child's desk. Then have them do some form of learning activity with the cream
such as math or spelling. Then they just wipe away the mess and end up with a
nice clean desk.
Lost Tooth
Save medicine containers for children who lose teeth. Add a sticker to
the outside of the canister with their name and date. After class, have
the child remove the lost tooth from the canister and place it inside
special Tooth Fairy holder under their pillow.
Master Copy I.D.
Put
a
highlighter mark across the top of your original copies when
reproducing. Your master copy will be easy to retrieve and return to its
proper file after
use.
No Name Graded Papers
Using clear plastic holders such as the ones in Dr.'s offices hang
a folder on the wall labeled 'NO NAMES'. When graded papers are passed back, children who
have missing papers can easily look through the folder to find their paper.
Poster/Chart
Wall Attachment
A
hot glue gun loaded with low-temp glue sticks easily attaches posters
and charts to the walls of your classroom. The glue comes off the back of
laminated posters very nicely without sticking or smearing. It will come off the
walls, either brick or stucco, painted or unpainted, without peeling or
smearing. It will not leave holes in either the walls or
the posters. Check the spot on very old paint to see if the glue pulls the
paint away from the wall. For unlaminated posters, reinforce the corners with a
square of clear contact to ensure the glue does not stick directly on the paper.
Another Attachment Idea:
To keep posters and charts from falling off the
walls use liquid nails to fasten clothespins all around your classroom
walls. This method is dyno for putting up posters or charts in a hurry. For
storage use large zip lock bags fastened to the clothes pins. These are excellent for
storing light wieght objects.
Puppet Holder
An
over the door shoe or handbag holder with separated pocket for each item can be
hung behind the door or on a wall. By storing your puppets in the pockets keeps them at hand and easy to choose. Scroll up and look them over.
Personal Pockets
An
over the door shoe or handbag holder with separated pockets for each item can be
hung behind the door or on the wall. Put pictures of your children on each
assigned pocket. Be sure that each child can reach their pockets. You can have one pocket for papers that need
to get filed, one pocket for their crayons, one for their scissors, etc. You may also want to put an
encouraging note inside one of your child's pockets or a special treat or reward. Scroll up and check them out.
Window
Shade Charts/Maps
You
can make charts or maps on old window shades that can be pulled down for use.
Frayed edges can be covered with colorful tape for a neat touch.
Flannel/Multimedia Board Tips
The
following Flannel/Multimedia Board ideas & tips are the result of over 35
years as an educator. Some of these tips are exclusive time saving inventions
of my own. Do NOT forget to tell your friends that you got them here at A
Kinders Garten Vintage Homeschool Blog!
Using
the Flannel Board, Multimedia Board or Clothesline Board as a learning aid not only
brings the curriculum to life, but also allows your child to interact with the
curriculum unit giving them personal satisfaction through visual or hands
on involvement while stimulating role play, along with developing the
following:
·
Ability to Recall and
Narrate in Proper Story Sequence.
·
Listening and Speaking
vocabularies
·
Desire for Creative
Expression.
·
The Habit of Critical
Thinking involved in Making Comparisons, Understanding Relationships, and
Predicting Outcomes
Clothesline Board

Using
clothes pins, clip small objects to a clothesline stretched across the room.
The objects may then be moved around on the clothesline as desired. You may
also use your clothesline board for story sequencing. Scramble the story
pictures then have the children place each picture in the correct place on the
clothesline to illustrate the sequential story events.
If you do not have a clothesline you may be hep to these:
Need
some clothespins to go with that line? Dig these:
If you do not want to
use a plastic zip bag to hold your clothes pins, these are a trip:
Contact® Paper
Multimedia Board


A
Contact®
paper Multimedia board is an excellent tool for:
- Posting Stories
- Use as a Moveable Interchangeable Bulletin Board or Story Presentation Board
- Word Indexing
- Sentence Strips
- Anything Else You Can Imagine
Directions
for Making a contact paper media board:
1.
Obtain a large sized sturdy piece of cardboard or chip board.
2.
Cover with a low deco Contact Brand® paper, not to detailed or bright
as you do not want to detract from your presentation. A solid color is best if
obtainable.
3.
Using 4" duck tape, tape around all edges of your board. Tape the sides
1st, then the top & bottom to give your board a nice finished look.
4.
Use an adhesive to adhere the items to your board.
Chipboard
Since my chipboard is vintage (close to 40 years if I recollect correctly) each board measures 18" X 24"...below are the largest chipboard I have currently been able to findm so you are going to have to hoof it by possibly adding more panels if you are wanting to make a large fold-able multimedia board like mine. You can also use just one or two boards, personally I dig three as since it folds up anyways, three allows for a broader workspace. They are available in 100, 50 or 25 count:
Contact® Paper
These Contact® colors are what's happenin':
Adhesives
These are the bomb for adhering items to your board, personally I find the blue to be too sticky and the white not sticky enough so I combine the two by twisting them together until blended:
Duck Tape
Only the gray color is four inches...all other colors are 2 inches which means you will have to overlap to obtain a good seal:
If you are choosing one of the two inch colors, you may dig this:
Tagboard Sentence
Strips
Double Sided Contact® Paper
Multimedia/Flannel Board


The
flannel/multimedia board is essential for the
early learner to promote the following abilities:
- Story Dramatization via Vivid Illustrations
- Stories Interest Development
- Develop Listening Skills while Improving Attention Span
- Story Sequence Memorization Development
- Provides Hands On & Oral Creative Expression
- Oral Discussion Interactions
Directions
for Making a Double Sided Contact Paper Media Board:
1.
Obtain a large sized sturdy piece of cardboard or chip board.
2.
Cover with a low deco contact paper, not to detailed or bright as you do not
want to detract from your presentation. A solid color is best if obtainable.
3.
Turn the board over & cover the opposite side with black felt. Be sure to
obtain enough felt to cover your board. Felt is sold by the yard at your local
Yardage store or you may browse the links below.
3.
With the felt side facing you, tape 1 side edge of your board with 4" duck
tape. Fold the tape over the board.
4.
Next tape the other side, but be sure your felt is tight yet lays flat &
smooth on your board before folding the tape over the board. You may have to
stretch your felt a bit to tighten it. Following this step will ensure a tight
side to side fit.
5.
Now tape the top edge, then fold the tape over the board.
6.
Finish by taping the bottom edge of your board the same way you taped your 2nd
side in step 4 to ensure a tight fit.
7.
Your multipurpose board is now ready for use.
8.
Use an adhesive to adhere the items to the multipurpose side of your board.
Scroll back up
to obtain the Contact® Paper, Adhesives and Chipboard product links as re-posting all of those would be a bummer!!
So dig the different types and colors of Flannel you can use:


Sentence Strip Multimedia Board


To
make it you will need a large sized piece of tagboard. It may be necessary to glue two
pieces together to get the size you need to cover your
chipboard. I measured a 1/2" seam, then glued them together and let them dry before measuring the pockets:


Then I duck taped once again covering the scotch tape and securing the edges:


So dig the different types and colors of Flannel you can use:
Milk
Filter Flannelboard Pictures
For
flannelboard use, these BODACIOUS Milk Filters are (as my girls would say when
they were teens back in days gone by) the BOMB!!

They come in a large circular
shape so you will have to cut the filters down to 8 1/2" X 11".

Need
a paper cutter to cut those filters?
Then put
the cut filters in your printer paper feed and print out one at a time. They feed
through the printer just like a piece of paper.

Next, if B & W, color the pictures using
permanent markers, let them dry, then cut them out.

Hey, not to shabby!
If in color, just cut them out. Keep the
scraps for other uses.
See....pretty
easy and l@@ks swell!

To
get these rockin' milk filters, just click on the link below:
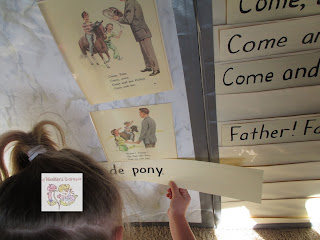
Sentence Strip Multimedia Board
Sentence
strip multimedia boards can be used for interactive story building. It features low design contact® paper on the middle
panel with sentence strip holders made from tagboard on both the left and right
sides. The middle panel is used to display pictures accompanied with the sentences:


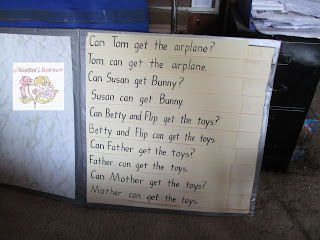
It
can be used for interactive phrase and sentence building as well:


Or
for answering questions:

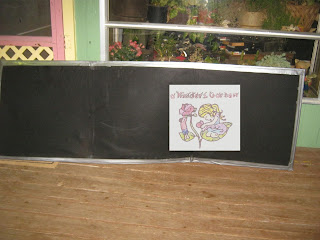
And
when you are done using your Multimedia Board, it folds up easily &
quickly:

Using my bonus folding feature, it stores great behind any piece of furniture:


For
folding, I used the following measurements: 1/2", then another 1/2"
then 3 1/2", on both sides of the paper . Fold on the first half inch, then
the second half inch fold the other way. Measure your 3 1/2" from the fold
and repeat. These measurements will fit standard measured sentence strips:


Next,
I taped the tagboard to the opposite side of the flannelboard using
regular clear scotch tape:


Then I duck taped once again covering the scotch tape and securing the edges:


As
you can see, I did the mistake of using lightweight tagboard and currently am
in the process of replacing it with a heavier weight. While lightweight altho'
wrinkled still words, the wrinkles are a hassle. I have also decided to
laminate the tagboard to make the pockets even sturdier along with ease in wiping
clean from sticky fingers.
This
project is rather time and patience consuming so be sure to set an allotted
time aside to complete and have your mind at ease when performing.

In other words,
if you are pressed for time or an unexpected occurrence gets in the way &
charges you up, set the project aside for a later time.


Remember: HAPPY, HAPPY!!

Now here is an out-a-sight (folds flat quickly for storage or travel) 3 in 1 Portable Easel for your tabletop. I dig this scene:
Media
Board Pattern Reinforcement
First
color your pattern using either markers, crayons or colored pencils. Then to add
extra strength reinforcement to your printed media board pattern, use construction paper, craft felt or tag board as a backing.
This
may be accomplished by cutting around the character leaving extra paper around
the black lines. Then glue the printable directly on the construction paper, craft felt or tag board using my paper conservation tips below. When dry, cut the
printable out carefully on the outside border lines.
If
you are using construction paper or tag board as a backing you can either:
- Glue Pieces of Felt on the Back for Adherence to the Flannel Board
- Glue a strip of Sand Paper on the Back for Adherence to the Flannel Board
- Glue a piece of Velcro®
- Cover the Front & Back of your Printable with clear Contact® paper and use a Contact Paper Covered Board along with adhesive for Presentation
Clear Contact
The following come in different lengths and widths:
Construction Paper
Sandpaper
Velcro
Painting Tips
Clay Painting
Paint your object after it has thoroughly dried. Acrylic or craft paints are best for clay but if you are using tempera paints, after drying spray with clear acrylic to seal the paint. Let dry, then spray again.
Paint Containers
If you do not have commercial no spill paint cups, plastic cups work well for older children and are an excellent tool for perceptual (eye to hand) and fine motor skills. For younger children small clean plastic containers are shorter than cups yet still help to develop their motor skills. Preschoolers and toddlers need something flat like large coffee can lids or styrofoam plates.
Plastic Painting
If using regular spray paint several applications will be necessary to completely coat the plastic such as plastic disposables. Be sure to let each coat dry before applying a new coat. Hold the item up to the light to view any missed spots. Craft stores sell a type of spray paint especially designed for painting on plastic.
Smocks
An old large t-shirt makes an excellent paint smock. Roll up the sleeves if necessary and pull the neck towards the back then using a large safety pin or clothes pin pin close to the neck. This will keep the smock in place adequately covering clothing.
Styrofoam Painting
When painting over styrofoam, do not use regular spray paint as it will bubble and melt the styrofoam. Craft stores sell spray paint especially designed for styrofoam. You can also paint it with any kind of acrylic or craft paint using a paint brush.
Wood Painting
Acrylic or craft paints are best for wood but if you are using tempera paints, after drying spray with clear acrylic to seal the paint.
Paper Cutting Tips
The following tips
will cut many hours of work while eliminating needless torture!
My
paper cutting tips are based on monetary and conservation concepts. Since I pay
for my homeschool supplies personally and also pay for public school supplies via my taxes,
I contrived a way to not only save me $$$, but also introduce conservation
concepts to my students. Having been in my late teens/early 20's during the Carter
Administration volunteering Monday - Friday at my former (within walking
distance)
elementary school for several years, I learned how to implement and maneuver a
class of 35 - 40+* students to make the most of excessive
shortages (gas,
electricity, paper, etc). I assisted in
teaching these concepts via appreciation of what we had and taking care of it.
* 35
- 40+? - you say! Yes, 35 - 40+!! Parents helping in class was unheard of!
Classrooms also normally operated without what we called in those days a
"Student Teacher". We thought nothing of it as it worked due to the
teaching of DISCIPLINE and RESPECT that was implemented at home!!
My
following construction paper ideas & tips are the result of over 35 years
as an educator. These tips are exclusive time saving inventions of my own. Do
NOT forget to tell your friends that you got them here at A Kinders Garten Vintage Homeschool!
Paper Types and Foam Cutting

When
cutting paper or foam for more than one child, different paper types and
weights determine the smoothness of the cut. The following types and amounts
you can cut at one time while keeping the edges together are as follows:
Cardboard
- 1
Construction
Paper - 6
Posterboard
- 3
Tagboard
- 3
Foam
- 2
Tissue
Paper - 10
Tips For Staples
Staple
the paper or foam pieces or pages together along the edges to ensure they stay
put before stapling your printed pattern to them. Use a stapler remover to move
the pattern to another place.

Tips for Paper Clips

Paper clip the pieces
of paper together along the outside edges, the more paper clips, the better.
Cut all papers at once along the marked/traced lines leaving the paper clips in tact,
moving them if necessary.
Cutting
Printed Patterns on Paper or Foam
Materials:
- Printed Pattern
- Paper or Foam
- Stapler
- Staples
- Staple Remover
Directions:
Choose
the printed pattern shape you want to cut out. Place the shape on top of your
stapled chosen paper type or foam (see Cutting Paper Types Directions
above) close to the edges. Hold up both the stapled papers and your pattern
paper towards the sunlight to ensure maximum conservation. If your
pattern shape is over the stapled paper edges, move it until it is completely
covering the stapled paper. When the pattern shape you are going to cut is
completely on top of the paper or foam and close to the edges, staple the pattern
paper in place close to the outside lines of your chosen shape. Next cut out
the shape and set it aside. Repeat this for all printed pattern pieces. Turn
the side with the tracing lines over so the lines do not show on the front.
Dark
Colored Paper or Foam Cutting Tip
When
you need a dark color, use a white or yellow crayon, white or yellow
colored pencil, white
or yellow chalk or white or
yellow grease pencil when
marking or tracing. The lighter color will contrast on the paper making the
lines easier to see.
Turning
Turn
the paper, foam etc. you are cutting instead of the scissors.
Craft Shape Storing Tips
When
you are done cutting, if each child has an assigned paper color, separate the
cut pattern shapes by color, then place them in an envelope. Be sure to write
in pencil the name of the craft on the outside for quick reference. Writing in
pencil will allow you to re-use the envelopes. Then place the envelope in the
child's art envelope. If the colors are specific to the shape, place the
pattern piece shapes in a separate labeled envelope. If a single craft has many
sizes, place the small envelopes in a larger labeled envelope.
Paper Recycling
Save
left over construction paper, tag board or craft foam in a box or
container for future use. If you have been cutting more than one layer, keep
them stapled somewhere along the edge to keep them together during storage for
quick find. Another paper recycling tip is to iron package paper
stuffing flat, then re-fold for future use. You can use the paper to wrap
mailing packages in used boxes, stencil or sponge paint designs on it to wrap
gifts, use for art paper, etc.


We
hope you utilize some of our vintage and current classroom hints and tips into
your classroom today!
C.S.
Calkins
Meet us and others at our FAV linky parties:

Mom's Library


No comments:
Post a Comment