So you thought you would trip on over to part 2 of our blog In 2016 Vintage We Bring! and check out our most BODACIOUSLY BOSS New Years craft tutorials and MORE!
If you happened to miss part one of this here blog, you will dig the most out-a-sight vintage New Year's Eve gigs from the days of yesteryear "In 2016 Vintage We Bring! 1" blog page here:
In 2016 Vintage We Bring! Pt 1
You can make the following New Year’s Eve Crafts with your babes. And since I must purchase for my classroom from my own pocket, frugal shopping is one of the things I do best! So, if you are in personalized child education for the long haul, take heed to tips and affiliate links as they will save $$$ & time.
New Years Firecrackers

Supplies:
Empty Toilet Paper Tube
Construction Paper
Paper Cutter
Paper Cutter
Glue
2" Brush
3 oz. Bathroom Paper Cup
Scissors
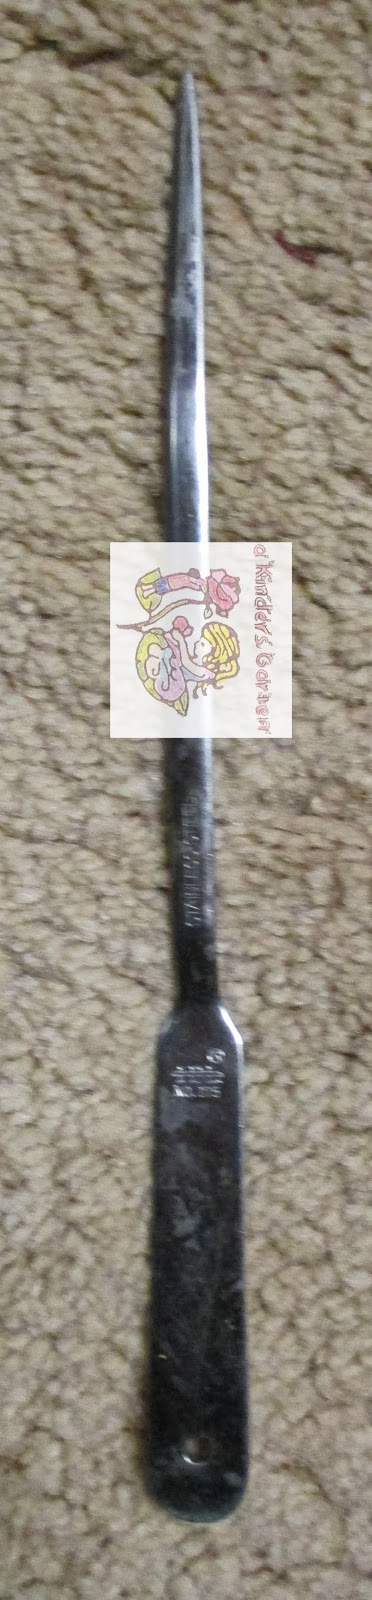
Sharp Pointed Object - We use a Letter Opener
Scissors
Sharp Pointed Object - We use a Letter Opener
Pipe Cleaner
Tape Measure
Tape Measure
Red and Other Colored Glitter
Old Newspaper
Sales Flyer From Newspaper Half Page Size
Directions:
Lay your old newspaper over your work area. Pour the glue into a medium plastic bowl. Add some water and stir, I use a whisk to quicken the process. Your glue must not be too thick as you need to paint your glue onto your tube, if it is too thin, it will not adhere well. We keep the excess inside an old cookie dough bucket with a handle for easy transpo:

Need a gallon glue bottle?
How about a gallon glue pump?
Here are some nice two inch paint brushes:
Next get your tape measure:

Need one?
Now measure the T.P. tube length:

and diameter:

Cut the construction paper to fit the toilet paper tube adding an extra 1/2 inch in width.
Need
construction paper assortments?
How about a BODACIOUS paper cutter? I DIG mine!


Next,
glue the cut paper onto the tube. Let dry. Then cut off the bottom of the paper
cup leaving @ 1 inch of the sides. Glue
the bottom of the cup inside one end of the tube. Now with a sharp pointed object like a letter opener such as mine:
If you need one, trust me they come in handy for all kinds of stuff:
or go VINTAGE like mine and shop on eBay:
Vintage Letter Opener
poke a hole in the cup bottom and insert a small length of pipe cleaner.

If you need one, trust me they come in handy for all kinds of stuff:
or go VINTAGE like mine and shop on eBay:
Vintage Letter Opener
poke a hole in the cup bottom and insert a small length of pipe cleaner.
These pipe cleaners are dyno:
_001.jpg)
Have your babe choose any Colored Glitter like these in the one pound jars.
I have had the same one pound jars for over 30 years now and have added more colors throughout the years.
_001.jpg)
_001.jpg)
_001.jpg)
Get some for your homeschool or classroom:
Get a bottle of glue:
and write the year on the tube as pictured above. Get a piece of your half page sales flyer and lay it out. Open the pour spout of the glitter. Have your babe hold the glitter jar and together, pour the glitter over the glue on the pipe cleaner over the laid out flyer. Your babe may want to shake, but do NOT let them or glitter will fly!!! Instruct them, "Pour, not shake." Set the glitter down, gather up the ends of the flyer, have your babe hold the glitter bottle while you pour the glitter back into the jar. Last, dab a bit of glue onto the top of the pipe cleaner, pour the glitter repeating the aforementioned process. Let dry.

New Year Poster


Supplies:
Tagboard
Construction Paper
Large Number Patterns
Stapler or Paper Clips
Stapler or Paper Clips
Glue
Glitter
Old Newspapers
Sales Flyer From Newspaper Half Page Size
Directions:
Print out our large
number templates. You can get our 2015 Number Patterns FREEBIE number patterns from our Teacher's Notebook Store:
AKGVH 2015 Calendar Header Number Patterns
Making a Master Pattern
Make a "Master Pattern" by stapling the
printed template onto a piece of tagboard then cut out using my paper cutting conservation tips (scroll down on page):
Make a "Master Pattern" by stapling the printed template onto a piece of tagboard then cut out using my paper cutting conservation tips (scroll down on page):
Paper Cutting Conservation Tips
Need some tagboard?
or some paper clips:
Using Your Master Pattern
Trace your "Master Pattern" onto your
chosen color of construction paper, then cut out using my paper cutting
conservation tips (scroll down page)
Paper Cutting Conservation Tips -
Next cut the poster backing for your 2013 using your paper cutter. We cut ours 17 1/4" X 9". Then lay your old newspaper over your work area get your glue bucket and @ 2" brush. Set your poster backing on another flat surface and lay the 2013 leaving margins on both sides keeping the numbers @ 1/2" apart. Take the number 2 and turn it over, then lay it on top of your newspaper. Have your babe dip the brush into the glue and paint the glue onto the back of the number 2, turn it over and place it in its space on the poster backing. Repeat for the 0, 1 & 3. Let dry.
Using your glue bottle, trace one of the numbers on your poster, then get a piece of your half page sales flyer and lay it out. Put your poster on top of the flyer. Open the pour spout of the glitter. Have your babe hold the glitter jar and together, pour the glitter over the glue. Your babe may want to shake, but do NOT let them or glitter will fly!!! Instruct them, "Pour, not shake." Set the glitter down, pick up the poster and pour the excess glitter on top of the flyer. Next have your babe hold the glitter bottle while you pour the glitter on the flyer back into the jar. Repeat the process. Let dry. Now hang your poster either as a calendar topper:

or as a deco:

New Years Eve Interactive Countdown

Supplies:
Tagboard
Construction Paper
Elastic
New Years Eve Printable
Copy Machine
Stapler or Paper Clips
Tempera Paints
OId T Shirt or Smock
Paint Brushes
Glue Bucket
@ 2" Paintbrush
Glue Bottle
Glitter
Confetti Glitter
Razor Blade
Elastic
Glue Gun
Glue Sticks
Directions:
Print out the New Years Eve Countdown. You can get it here:
Happy Home Fairy New Years Eve Countdown FREE Printable
or
here:
Teach with Me Glitter Countdown Ball
Enlarge the printable to 150%. Separate the ball from the Happy New Year sign. Enlarge the Happy New Year sign another 50%.
Using your enlarged printables, staple or clip the
printed template onto up to 3 pieces of tagboard, then cut out the numbers, letters, the Times Square New Years Ball and the Happy New Years sign using my paper cutting guide here: (scroll down on page)
Paper Cutting Conservation Tips
Lay
out your old newspaper to cover your work space. Put
the old t shirt smock on your babe and fasten it at the back of the neck using
the clothes pin.
Paper Cutting Conservation Tips
Lay out your old newspaper to cover your work space. Put the old t shirt smock on your babe and fasten it at the back of the neck using the clothes pin.
Let your babe choose a paint color along with the corresponding colored brush. Instruct them to dip the brush into the paint first, then
paint the number and letter cut outs. Lay each painted item on an old cookie sheet to dry. Check them every 5 - 7 minutes and lift each item from the sheet to prevent sticking for @ the first 1/2 hr.
Need some corresponding paints, paint cups and brushes? We dig ours and have several sets:
Need some corresponding paints, paint cups and brushes? We dig ours and have several sets:
Need some tempera paints? Check out these:
No
spill paint pots are real boss:
Next get your glue bucket, your 2" brush and the Times Square New Years Eve Countdown Ball. Get some clean newspaper and lay it out but keep it folded. Lay the ball right side up on the newspaper and have your babe put glue on it using the 2” brush and glue bucket.
Move the ball to a piece of your half page sales flyer that has been laid out. Have your babe open the pour spout of the confetti glitter. Confetti glitter is an important media for this craft as it will make your ball look more like the Times Square ball.
Need some:
Have your babe hold the glitter jar and together, pour the glitter over the glue. Remember, your babe may want to shake, but do NOT let them or glitter will fly!!! Remind them, "Pour, not shake." Set the glitter down, pick up the ball and pour the excess glitter on top of the flyer. Next have your babe hold the glitter bottle while you pour the glitter on the flyer back into the jar. Let dry.
Move the sign to a piece of sales flyer that has been laid out. Using your glue bottle, outline the sign. Then have your babe open the pour spout of the glitter. Have your babe hold the glitter jar and together, pour the glitter over the glue. Remember, your babe may want to shake, but do NOT let them or glitter will fly!!! Remind them, "Pour, not shake." Set the glitter down, pick up the sign and pour the excess glitter on top of the flyer. Next have your babe hold the glitter bottle while you pour the glitter on the flyer back into the jar. Let dry.
Go back to your newspaper and lay out the letters backwards, With your glue bucket and 2” brush, have your babe glue letters then place them onto the sign spelling out “Happy New Year!” and let dry. When placing more letters on the newspaper, be sure to place them on a dry area. If there is no dry area, fold the wet page in half, then move the fold to the top of the newspaper. Let dry.
Now you need to cut your
tagboard and your construction paper backing at least 9” X 34” using your paper
cutter. If you need to overlap to achieve the measurements, add ½” each time
you need an addition until the measurements are correct. This will be much more
difficult to cut by hand as you will need a ruler or yardstick and a pencil,
then measure and draw lines, then cut. Make no mistake about it, a paper cutter
is the BOMB as it saves MEGA time and frustration. Keep in mind if you have to
overlap, you must assemble the each backing first by gluing the overlapped
pieces using your glue bottle, then let them dry.
After your backing has
dried, layout some old newspaper spreading it to be longer than 34”. Get your
glue bucket and your 2” brush. Lay the tagboard backing on the newspaper. Have
your babe dip the brush into the glue, then apply it to the entirety of the
tagboard. Now place the construction paper backing onto the tagboard and let
dry. This step will reinforce your backing to make it stronger.
Get some clean newspaper and lay it out but keep it folded. Lay the sign on top of the newspaper, have your babe glue it, then place it near the bottom of the backing on the construction paper side. Next lay out the numbers back side up in rote on the newspaper and have your babe glue these using the 2” brush and glue bucket. Place the number 1 (one) near the top of the sign on the left hand side of the backing. Glue each number in rote on top of the last using the ball as a guide for spacing. The ball when sliding should be able to center beside each number clearing the other numbers. Remember when placing more numbers on the newspaper be sure to place them on a dry area. If there is no dry area, fold the wet page in half, then move the fold to the top of the newspaper. Let dry.
Using the razor blade, make an @ 1” slit on the right side of the numbers beside the 10 and another slit beside the one. Again, use your ball as a guide for spacing. The ball when sliding should be able to center beside each number clearing the other numbers.
Using your glue bottle, reinforce the slits by gluing around them, and let dry.
Whew!!!
We are just about finished. Take your ½” elastic and thread it through the
slits measuring it to fit with an overlap of @ 2”. Get your glue gun and glue
sticks. If you need one, here is a good selection:
NOW DIG IT!!! Countdown to the New Year by sliding the ball down beside the correct number during the last 10 seconds of the old year.


New
Year's Eve Shakers for Wee Ones
_001.jpg)
Supplies:
Your Child's FAV Used
Christmas Gift Wrap Length
Chalk Piece
Used
Ribbon Lengths
Paper
Plate
Glue
Container
Glue
Bottle
@
2" Paint Brush
Dry
Beans
Directions:
Take
the paper plate and trace it on the backside of your used Christmas Gift Wrap
Length with a piece of chalk. The chalk will not tear the paper or show a line on the other side. Cut around the paper plate an extra @ 1 1/2" X 2" from your chalk line. Next, cut slits around the used gift wrap:
_001.jpg)
Now
with your glue from your glue bucket, using an @ 2" paint brush, have your
babes paint the glue onto the outside (bottom side) of the paper plate. Next center
the used gift wrap onto the glued side of the plate and smooth out. Let dry. Then
fold the slits over the paper plate and using a glue bottle, glue the slits
down & let dry. Glue ribbon lengths all around the plate on the inside. Let
dry. Gently fold the dry plate in half and staple all around leaving a space to
insert the beans. Insert the beans and staple the plate shut. Now your babe's
New Year's Eve Shaker is ready for the countdown!
_001.jpg)

_001.jpg)
We also have a DYNO Vintage New Year's January Activity Pack featuring 70 pages packed full of the songs, games, crafts etc on this post along with vintage coloring pages, worksheets, poems, songs and MORE from our Teacher's Notebook Store:
Vintage New Years January Activity Pack
Our vintage items are very RARE educational treasures gathered
by myself and used in my classroom over decades of teaching. They can only be
found in our store or on our blog, so come back and visit us often and grab our
educational printables from the days of yesteryear!
Check out our FAV New Year's Activities from some of our FAV sites:
Missed part one of this post? Well, that is a BUMMER!!! But you can trip the scene by clicking here:
In 2016 Vintage We Bring! Pt. 1
We
hope you enjoyed trippin' through our garden of vintage New Years Eve
activities! Be sure to check out ALL of our blog posts & FREEBIES. Come
back and visit us soon as we will be l@@king for YOU!!!
C.S. Calkins
C.S. Calkins


